Details of how we got on in UK Series 3, filmed at Elstree Studios, London.
Some of the preparations we made for Series 3 of Robot Wars UK. Mainly concentrated on increasing the power and reliability of the axe.
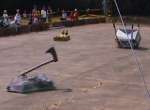
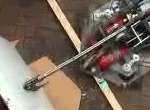
 Testing the new axe the day before RobotWars filming, in the hotel car park. Interested spectators are the Cerberus team, our opponents the next day...
Our heat is due for broadcast on 17 March 2000 at 6:45 pm.
 Made up a couple of new axes - one for Robot Wars and one for Battlebots in
November (the weight limit at BB is higher, allowing us to use a larger axe).
Made up a couple of new axes - one for Robot Wars and one for Battlebots in
November (the weight limit at BB is higher, allowing us to use a larger axe).
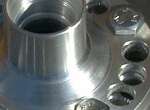 Machined up an ally replacement for the Nylon stub axle for the lever that
drives the axe. The Nylon was too flexible, allowing it to be pushed out of the
bearing.
Machined up an ally replacement for the Nylon stub axle for the lever that
drives the axe. The Nylon was too flexible, allowing it to be pushed out of the
bearing.
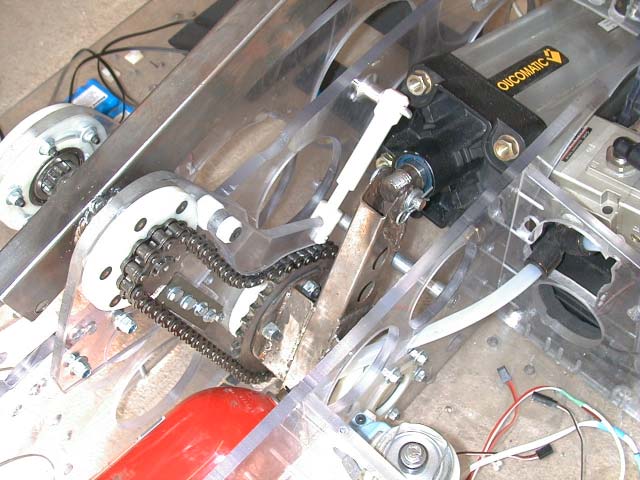 The new tensioner in place. It didn't last long, though - it broke during the
fights, when trying the pull the axe out of one of our opponents (you'll have to
buy the International Championship video to find out who!). I think our next
design will have to do away with a tensioner altogether, using a much more rigid
structure adjusted to exactly the right length for the chain.
The new tensioner in place. It didn't last long, though - it broke during the
fights, when trying the pull the axe out of one of our opponents (you'll have to
buy the International Championship video to find out who!). I think our next
design will have to do away with a tensioner altogether, using a much more rigid
structure adjusted to exactly the right length for the chain.
 When testing the axe, we bolted KHz to the floor of the garage. The M10 bolts
took a lot of punishment from the recoil!
When testing the axe, we bolted KHz to the floor of the garage. The M10 bolts
took a lot of punishment from the recoil!
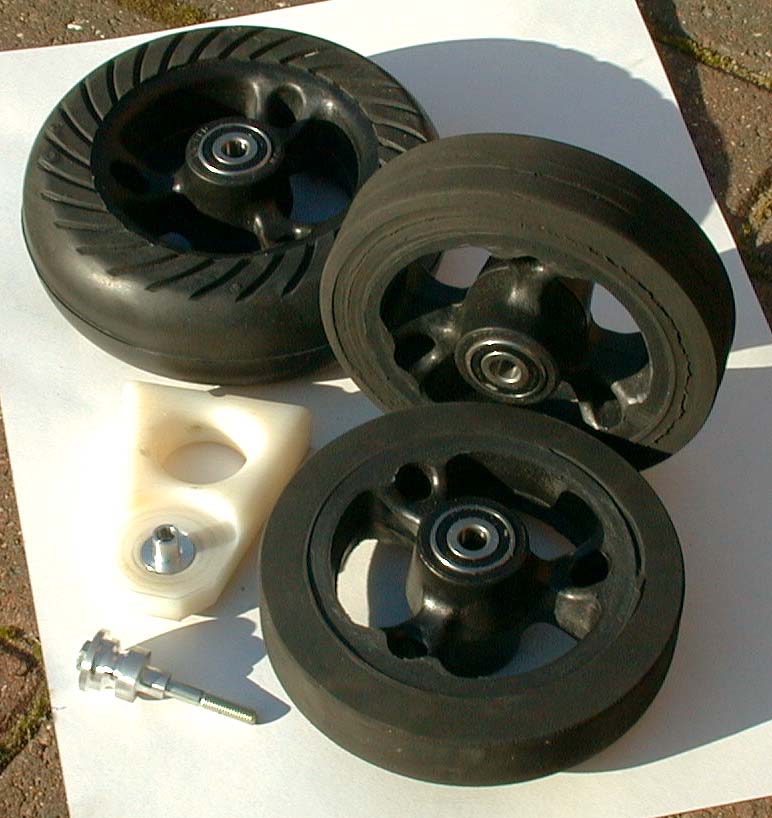 The existing front wheels only used needle roller bearings, and were therefore
suffering bad wear under side loading. Looking at the GoPed we won at Long
Beach, I realised that the wheels on that would be ideal - built-in ball races
and nice grippy rubber. Ordered a few from the Line
1 Go-Ped Shop. Machined some of the rubber off them to lose a bit of weight
and make them fit into the housings. As it turned out, we made them rather too
narrow and they peeled off the rims rather easily - which would be the cause of
our downfall in Series 3... For Battlebots Vegas we made up some more, but left
them at almost full width and this seemed to do the trick.
The existing front wheels only used needle roller bearings, and were therefore
suffering bad wear under side loading. Looking at the GoPed we won at Long
Beach, I realised that the wheels on that would be ideal - built-in ball races
and nice grippy rubber. Ordered a few from the Line
1 Go-Ped Shop. Machined some of the rubber off them to lose a bit of weight
and make them fit into the housings. As it turned out, we made them rather too
narrow and they peeled off the rims rather easily - which would be the cause of
our downfall in Series 3... For Battlebots Vegas we made up some more, but left
them at almost full width and this seemed to do the trick.
 BattleBots Long Beach
 Photos of the machines we saw at BattleBots
 Us Brits done good at BattleBots! At the competition in Long Beach, California, We came second in the Duel, and Razer won the Rumble (melee).
I also won the best driver award.
Us Brits done good at BattleBots! At the competition in Long Beach, California, We came second in the Duel, and Razer won the Rumble (melee).
I also won the best driver award.| First round | bye | |
| Second round | Punjar | won |
| Third round | Nightmare | won |
| Fourth round | Vlad the Impaler | won |
| Fifth round | BioHazard | lost |
| Sixth round | Rhino | won |
| Final | BioHazard | lost |
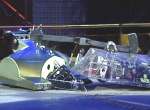
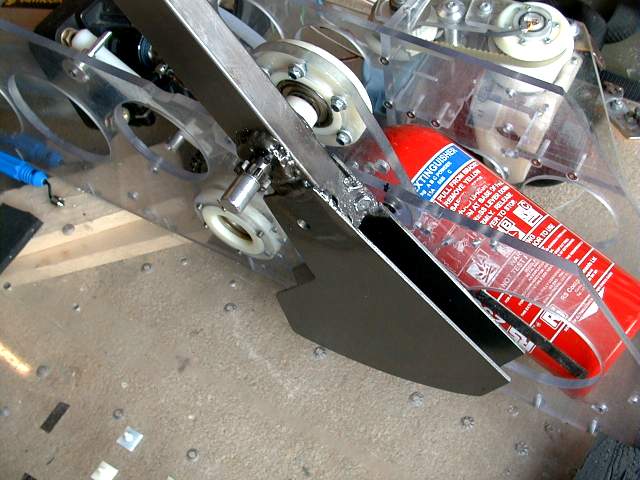 Working on the new counterweight for the axe. Will be filling the space between the 4mm steel plates with 4kg of lead.
Thank goodness for the higher weight limit (90.9kg) at BattleBots!
If we fire the axe without a counterweight, the robot almost does a backflip from the recoil.
Working on the new counterweight for the axe. Will be filling the space between the 4mm steel plates with 4kg of lead.
Thank goodness for the higher weight limit (90.9kg) at BattleBots!
If we fire the axe without a counterweight, the robot almost does a backflip from the recoil.
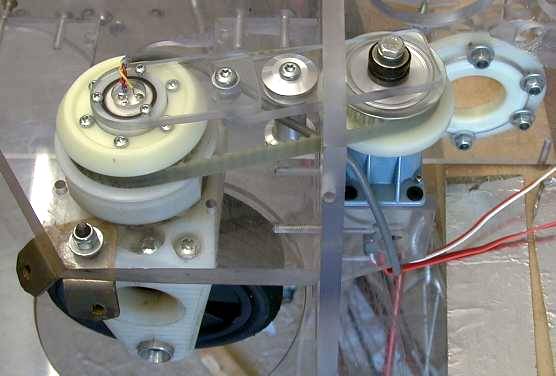
This shot also shows the axle about which the axe pivots (with one support plate and bearing removed).
The axle is the splined output shaft from a Honda 90 motorcycle.
I made up an ally cap for the near end to make the diameter up to the 17mm of the rest of the shaft, so that we can run a 17mm i.d. bearing at each end.
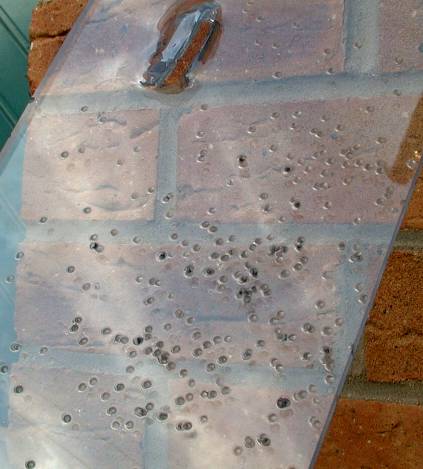 Attended an excellent shooting evening at Rebecca's parents' house.
Having survived a duel fought with 18th century duelling pistols,
loaded with blackpowder-propelled paintballs (we both missed),
I thought I'd see what effect an 8-bore (50% bigger than a 12-bore - a lead ball fitting
the barrel would weigh 1/8 lb, 1/12 lb for a 12-bore) shotgun had on our armour.
Fired at the same piece of 9.5mm polycarbonate that we had pierced with the axe, from a range of about 10 yards - no penetration.
Attended an excellent shooting evening at Rebecca's parents' house.
Having survived a duel fought with 18th century duelling pistols,
loaded with blackpowder-propelled paintballs (we both missed),
I thought I'd see what effect an 8-bore (50% bigger than a 12-bore - a lead ball fitting
the barrel would weigh 1/8 lb, 1/12 lb for a 12-bore) shotgun had on our armour.
Fired at the same piece of 9.5mm polycarbonate that we had pierced with the axe, from a range of about 10 yards - no penetration.
 Pictures from the Bledlow Ridge School event on the 26th June.
 A successful weekend spent tuning the axe.
 Video clip (520KB) from the School fete at Bledlow Ridge, near High Wycombe in Buckinghamshire.
 Some footage (510KB) of the axe tests. Now that it's reliable, we can start tuning it...
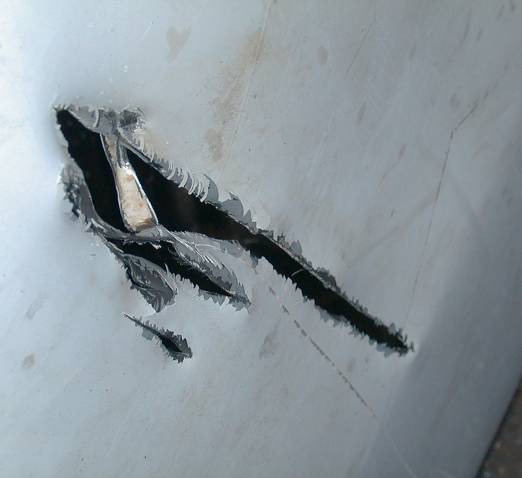 First tests of the new axe. We had a few problems at first with bearings popping out and
breaking the 1/2" chain(!), due to the increased power. Now working well.
Click the thumnail for a pic of how the Montego bonnet target suffered...
First tests of the new axe. We had a few problems at first with bearings popping out and
breaking the 1/2" chain(!), due to the increased power. Now working well.
Click the thumnail for a pic of how the Montego bonnet target suffered...
 Yesterday was our day at the auditions for Series 3. Went very well - KHz performed faultlesly,
which is more than can be said for my driving!
Huge number and variety of new machines.
Yesterday was our day at the auditions for Series 3. Went very well - KHz performed faultlesly,
which is more than can be said for my driving!
Huge number and variety of new machines.
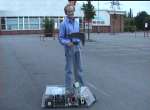
Got back to Oxford and thought I might as well make use of a deserted carpark for some testing.
It's the first time KHz has ever been run for more than about a minute,,,
 Some pics of the machines we saw at the auditions
 It works! Just got KHz running again.
Spent yesterday finishing off the software and hardware for the onboard mixer (Basic Stamp II).
I'll be putting up details of it in the HowTo section, when I get a chance.
It works! Just got KHz running again.
Spent yesterday finishing off the software and hardware for the onboard mixer (Basic Stamp II).
I'll be putting up details of it in the HowTo section, when I get a chance.
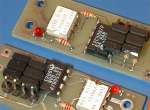
 Drilled and tapped 8 new M3 threads in the heatsink of the 4QD 200 amp speed controller, so that I could mount
the other controller back to back with it. Made up a couple of brass guides to ensure that the holes were central (used the holes in the bus-bars as guides)
and that the tap went in straight.
Drilled and tapped 8 new M3 threads in the heatsink of the 4QD 200 amp speed controller, so that I could mount
the other controller back to back with it. Made up a couple of brass guides to ensure that the holes were central (used the holes in the bus-bars as guides)
and that the tap went in straight.
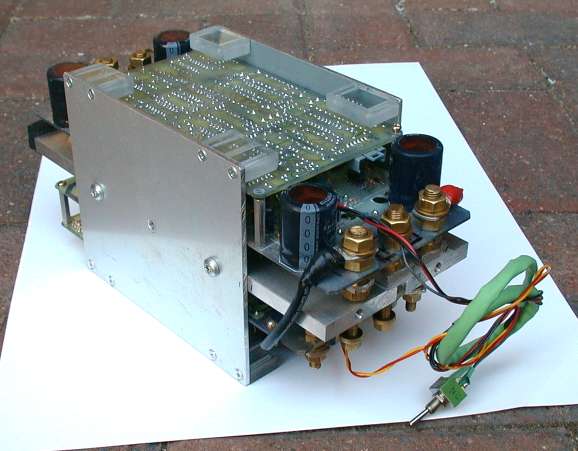 Fitted two 4mm ally side plates to the heatsink for extra cooling and to mount some
power resistors that we need.
Fitted two 4mm ally side plates to the heatsink for extra cooling and to mount some
power resistors that we need.
The auditions for Series 3 are taking place at the weekend,
so have taken the rest of the week off to try and get KHz ready.
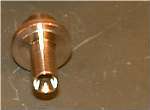
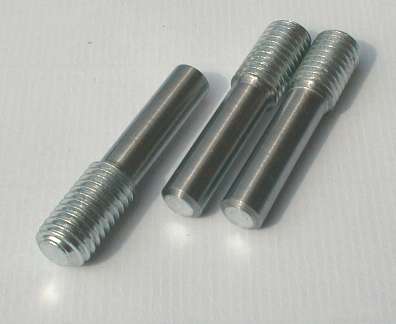 Made up some drive pegs, by turning down M10 high tensile bolts.
 Pegs engage with spokes of wheel, with padding in-between to absorb shocks.
Temporarily using some pneumatic hose - hopefully get some thicker rubber tubing.
Pegs engage with spokes of wheel, with padding in-between to absorb shocks.
Temporarily using some pneumatic hose - hopefully get some thicker rubber tubing.
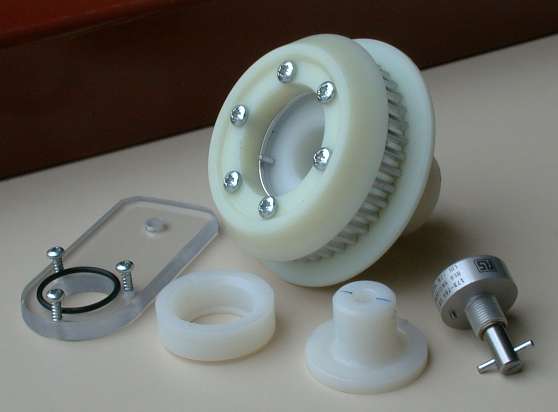 Fitted the steering feedback pots. Clamped in place with an 'O' ring, so that they can be adjusted.
 Works well. Around double the steering angle available that we had last year.
 Eventually got the new steering finished.
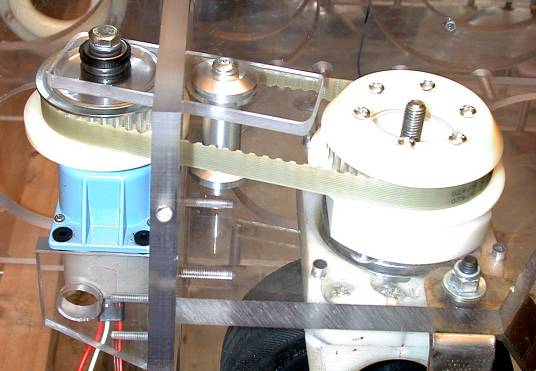 Cap on the central ally post is eccentric, allowing the belt tension to be adjusted.
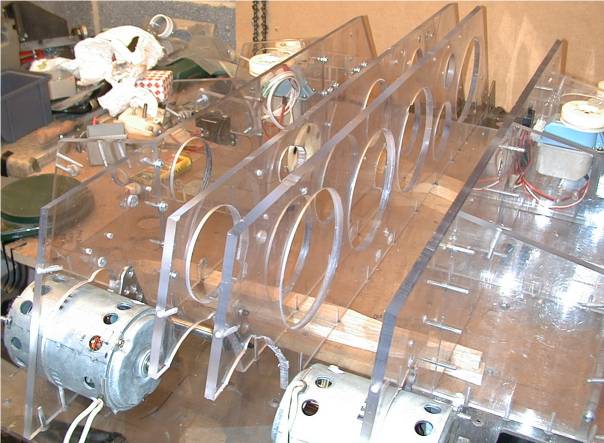
 Dom cut out some new panels for the sides and rear. 6mm polycarbonate. The white film is just for protection.
The rear had been cut by RoadBlock's cicular saw and
one of the sides had been warped by the heat of the flame pit.
Dom cut out some new panels for the sides and rear. 6mm polycarbonate. The white film is just for protection.
The rear had been cut by RoadBlock's cicular saw and
one of the sides had been warped by the heat of the flame pit.
 Finally, a decent steering arrangement!
 Just received a couple of TeamDelta's neat little RC switches.
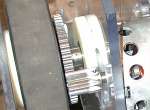 New gearboxes almost complete. Single 10:50 gear reduction. Because the 10 tooth pinion has to be mounted on the 12mm motor shaft,
it has a corrected tooth form, giving it a 22mm PCD (Pitch Circle Diameter - normally 20mm) -
this leaves more metal between the base of the gear teeth and the shaft bore.
This means that the gear centres are 61mm apart, rather than 60mm.
That's a nice feature of 2 Mod gears - you just add the number of teeth together to get the distance in mm.
New gearboxes almost complete. Single 10:50 gear reduction. Because the 10 tooth pinion has to be mounted on the 12mm motor shaft,
it has a corrected tooth form, giving it a 22mm PCD (Pitch Circle Diameter - normally 20mm) -
this leaves more metal between the base of the gear teeth and the shaft bore.
This means that the gear centres are 61mm apart, rather than 60mm.
That's a nice feature of 2 Mod gears - you just add the number of teeth together to get the distance in mm.
 Spring loaded catch to hold the axe back. Doubles as a safety catch.
 Fitted the axe to the shaft. Bolted it on so that we can fit alternative heads.
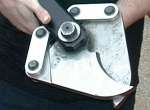
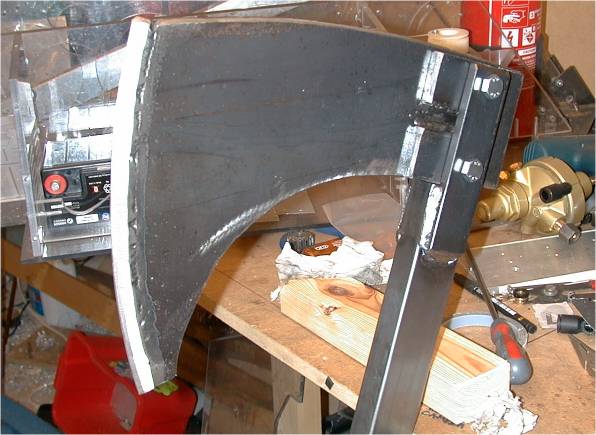
 Made up a new head for the axe.
Took a paper pattern to a local engineering company and they cut it out of 10mm steel plate with their plasma cutter.
I then welded on a 12mm silver steel bar, which is hardened by the heat, and ground it down to to a nice edge.
Made up a new head for the axe.
Took a paper pattern to a local engineering company and they cut it out of 10mm steel plate with their plasma cutter.
I then welded on a 12mm silver steel bar, which is hardened by the heat, and ground it down to to a nice edge.
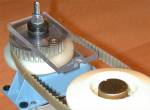
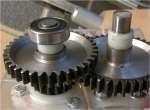
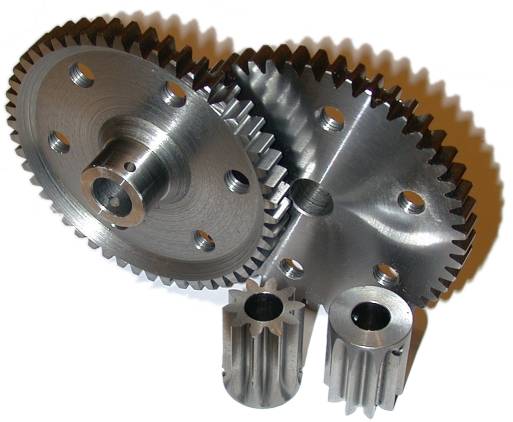 Gears arrived from HPC. Finish on inside face of 50 tooth a bit rough. Maybe they couldn't grind that face. Otherwise excellent. Six tapped holes are for drive pegs that engage with wheel spokes - avoids need for keyways in axle.
 Turned up a brass adaptor for connecting the hydraulic hose to the Tank.
See Pneumatics page.
Turned up a brass adaptor for connecting the hydraulic hose to the Tank.
See Pneumatics page.
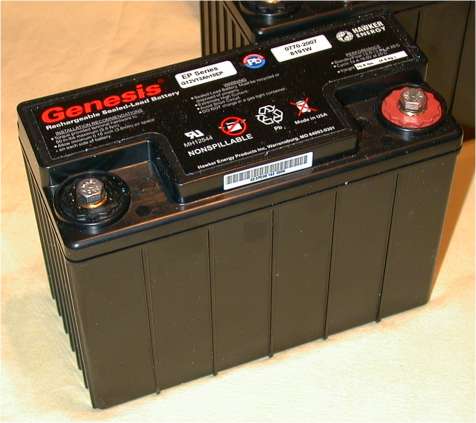 The Hawker Energy Genesis batteries were delivered today.
About Ł60 each for 12V, 13Ah from DMS.
The Hawker Energy Genesis batteries were delivered today.
About Ł60 each for 12V, 13Ah from DMS.
 Made a start at losing some weight from the chassis. Saved over 1kg from just the two centre bulkheads.
Further progress has been delayed, as I managed to slice open my thumb with the hole cutter...
Made a start at losing some weight from the chassis. Saved over 1kg from just the two centre bulkheads.
Further progress has been delayed, as I managed to slice open my thumb with the hole cutter...
 Started the rebuild. I'm redesigning the gearboxes.
Currently using 15:36+18:40 giving a ratio of 5.33.
The new box will just be one pair of gears, 10:50. Simpler, lighter and much stronger.
Started the rebuild. I'm redesigning the gearboxes.
Currently using 15:36+18:40 giving a ratio of 5.33.
The new box will just be one pair of gears, 10:50. Simpler, lighter and much stronger.
Thought I might as well take some pics of the old box - click on thumbnail.